Showing posts with label To Eat. Show all posts

Friday, August 1, 2014

What the Walls ate

Haven't you been wondering what in the world I made for dinner this week? Well, lucky you (not you Darren), I am here to tell you. One of my friends and readers Jen, also seen here, asked if I would put some meal planning suggestions on the blog. I have been thinking about it ever since. This was months ago. Months. There are so many great bloggers who meal plan, like her and her, I struggled with what I really had to offer. Then I told myself to calm down, she literally just means, what did you eat and will my kids eat it. Because that is the question of every mother, everywhere.
I try to casually meal plan each week. What I mean by that is that I don't clip coupons, because I can't remember to bring them, and I don't read circulars, because they confuse me. And yes, you should totally be taking my smart advice.

I like to look through my cookbooks and my dinner and kid friendly Pinterest boards to see what I feel like cooking this week. I am much more likely to actually cook, if I am excited about either trying something new, or making something I know my family will eat.

Anyway, on with what the Walls ate!

Monday - Out to dinner downtown with Alex. Well, crap, already blowing my meal plan. Push the fish to Tuesday.

Tuesday - Sauteed Trout with roasted kale for us and Panko-fish sticks and peas from the freezer for the boys.
Trout Recipe:
2 fillets of ruby red or rainbow trout
Tony Chachere's
Olive Oil
1. Rub the non-skin side with olive oil and sprinkle the Chachere's on to your liking
2. Heat a good glug of olive oil in a pan until hot
3. Cook fish, non-skin side down for 3 min then flip
4. You will know when the fish is done (in 2-3 more min) when you jab your spatula in it and it flakes.

Panko-fish sticks
This is my favorite and only fish stick recipe. The boys love it and I have been known to force it on their friends as well. You can use halibut like they say in the recipe (which I never have), cod or snapper. If I can get fish that has not been frozen, I like to make a bunch and flash freeze them for later. Pull them out for dinner, 10 min in the toaster oven and you are set. I obviously don't make the tartar sauce. Please, that would be a total waste of my time. Not making fish sticks, when Gorton's make a hell of a fish stick, no. Just the tarter sauce.

Wednesday - Rotisserie chicken, mac and cheese, roasted cauliflower and broccoli. See how fancy I am!

Thursday - Black bean and spaghetti squash tacos and roasted brussels sprouts for us and quesadillas and strawberries for the boys. Just when you thought I was normal-ish with the chicken, I threw this at you.

To make the tacos easier for the weeknight, I pre-browned the meat and roasted the spaghetti squash a few days ahead when I was already in the kitchen and the oven was on. They will keep in the fridge, then all I had to do was microwave the beans, meat and squash on Thursday. I used some of the Mexican cheese and corn tortillas from our tacos, combined with Monterrey jack for the quesadillas. Everything gets used and you only slightly feel like a short order cook.

Side note: I roast everything in my toaster oven. I detest turning on the big oven to heat up my entire house. Invest in a good toaster oven (or have your mom do it for you, like I did) and it will be worth it. Everything takes 8-15 minutes in there. You most likely know this and are rolling your eyes even harder at me.

Friday - Make your own pizza. The boys think we are super fancy when I pull out the pizza stone. I buy either the DiGironio (have you had them lately? Delicious!) or the frozen dough in the bread section of the freezer. You can make it, but even I don't do that. Mainly because I can't ever remember to let it rise, or whatever else bread is supposed to do.

Pizza
Frozen dough (2 for a family of four, but get two extra)
Classico Fire Roasted Pizza Sauce
Mozzarella Cheese (3 packages)
Basil
Garlic Salt
1. Follow the instructions on the dough to cook
2. Top with sauce and cheese
3. You really don't need these instructions, I am just assuming no one is still reading.

But if you are, let me make it worth your while....Why the extra dough, you are thinking. Well, to make these of course:
Pizza Rolls
Alex and boys approved, and inhaled. Clearly, I have a thing for pizza as this is my second post about making small ones and freezing them. Here is the first, in case you were wondering/trying to forget. I made these while the pizza was cooking and baked them while I was cleaning up. I have to do stuff like this before I sit down. I want to die, but it is worth it to have it all in the freezer and done before 7pm.

I omitted the pepperoni and added a layer of sauce. You will want to make more and will be so happy you have those TWO extra balls of dough to do just that. Plus, you can use up all the cheese and pizza sauce and feel super proud of yourself. No? Just me?

Cook the delicious mounds of bread, cheese and sauce, flash freeze them and then pop them into a lunch box. Mom of the year. I am certain they will make children forget about all the yelling this summer has brought.

No? Just me? Liars...

Friday, July 18, 2014

Don't be scared by these tacos

Because they are delicious. These black bean and spaghetti squash tacos are from my favorite blogger, turned cookbook author, Smitten Kitchen and are so, so good.
Alex and I are back on the paleo kick and these basically fit the bill. I added ground beef to make it "a meal" for Alex, but they would be just as good without. They sound super weird and off-putting, but the spaghetti squash acts, sort of like the lettuce/peppers on a fajita and all the seasonings make it very flavorful. Why do I ever doubt Deb??

Spaghetti Squash and Black Bean Tacos
Recipe from Smitten Kitchen cookbook
Makes enough for sixteen 6-inch tacos

3 pounds spaghetti squash (either one large or 2 small) – You don’t want to go any larger than 3 pounds because there won’t be enough seasoning to flavor your squash mixture, but feel free to go smaller
1 lb ground beef (you will not need it all for the tacos)
2 tablespoons (about 1 lime) freshly squeezed lime juice
1 teaspoon chili powder
1/2 teaspoon ground cumin
1/2 teaspoon ground coriander
1/2 teaspoon coarse salt
1 15-ounce can of black beans, rinsed and drained very well
roughly 1/4 cup finely diced red or white onion – only used for garnish, add as you like
crumbled queso fresco or Cotija cheese - both are so similar in taste and texture that it doesn't really matter which one you use
fresh cilantro leaves
10-16 6-inch soft corn tortillas
  1. Preheat your oven to 400 degrees and prep and cook up your spaghetti squash. Rinse your squash, cut it in half lengthwise, scoop out the seeds, throw about 1/2 tablespoon olive oil on each half, sprinkle with salt and pepper and place both halves face down on a rimmed baking sheet. 
  2. Roast the squash halves in the pre-heated oven until tender and easily pierced with a fork, 25-40 minutes, or longer depending on the squash. Remove from the oven and set aside until they are cool enough to handle. 
  3. While the squash is cooking, brown the ground beef. I added the same seasoning for the squash (see step 4). 
  4. Prep your squash ingredients. In a small bowl mix together the 1 teaspoon chili powder, 1/2 teaspoon ground cumin, 1/2 teaspoon ground coriander, and 1/2 teaspoon coarse salt. Add the 2 tablespoons of lime juice to the bowl and whisk to combine.set aside. 
  5. Dice up your red onion, wash up the cilantro and trim off the bottom stems, rinse and drain your black beans and throw your cheese into a bowl. 
  6. When the squash is finished cooking, let it cool for a few minutes so its easier to handle. Working over a large bowl, gently scrape out the flesh with a fork. 
  7. Pour the chili and lime mixture over the squash strands and toss well to combine. You will notice that the color of the squash will change from a golden-yellow to an orange color.
  8. You can heat up your tortillas at any time, either while your squash is cooking, cooling or after it’s been mixed together with the spices. 
  9. Then just assemble your tacos. Sprinkle each tortilla with a layer of black beans, squash, cheese and cilantro. Enjoy!
I had left over black bean/ground beef mixture and squash. I frozen them separately and then reheated later. Such an easy and healthy meal.

Monday, May 5, 2014

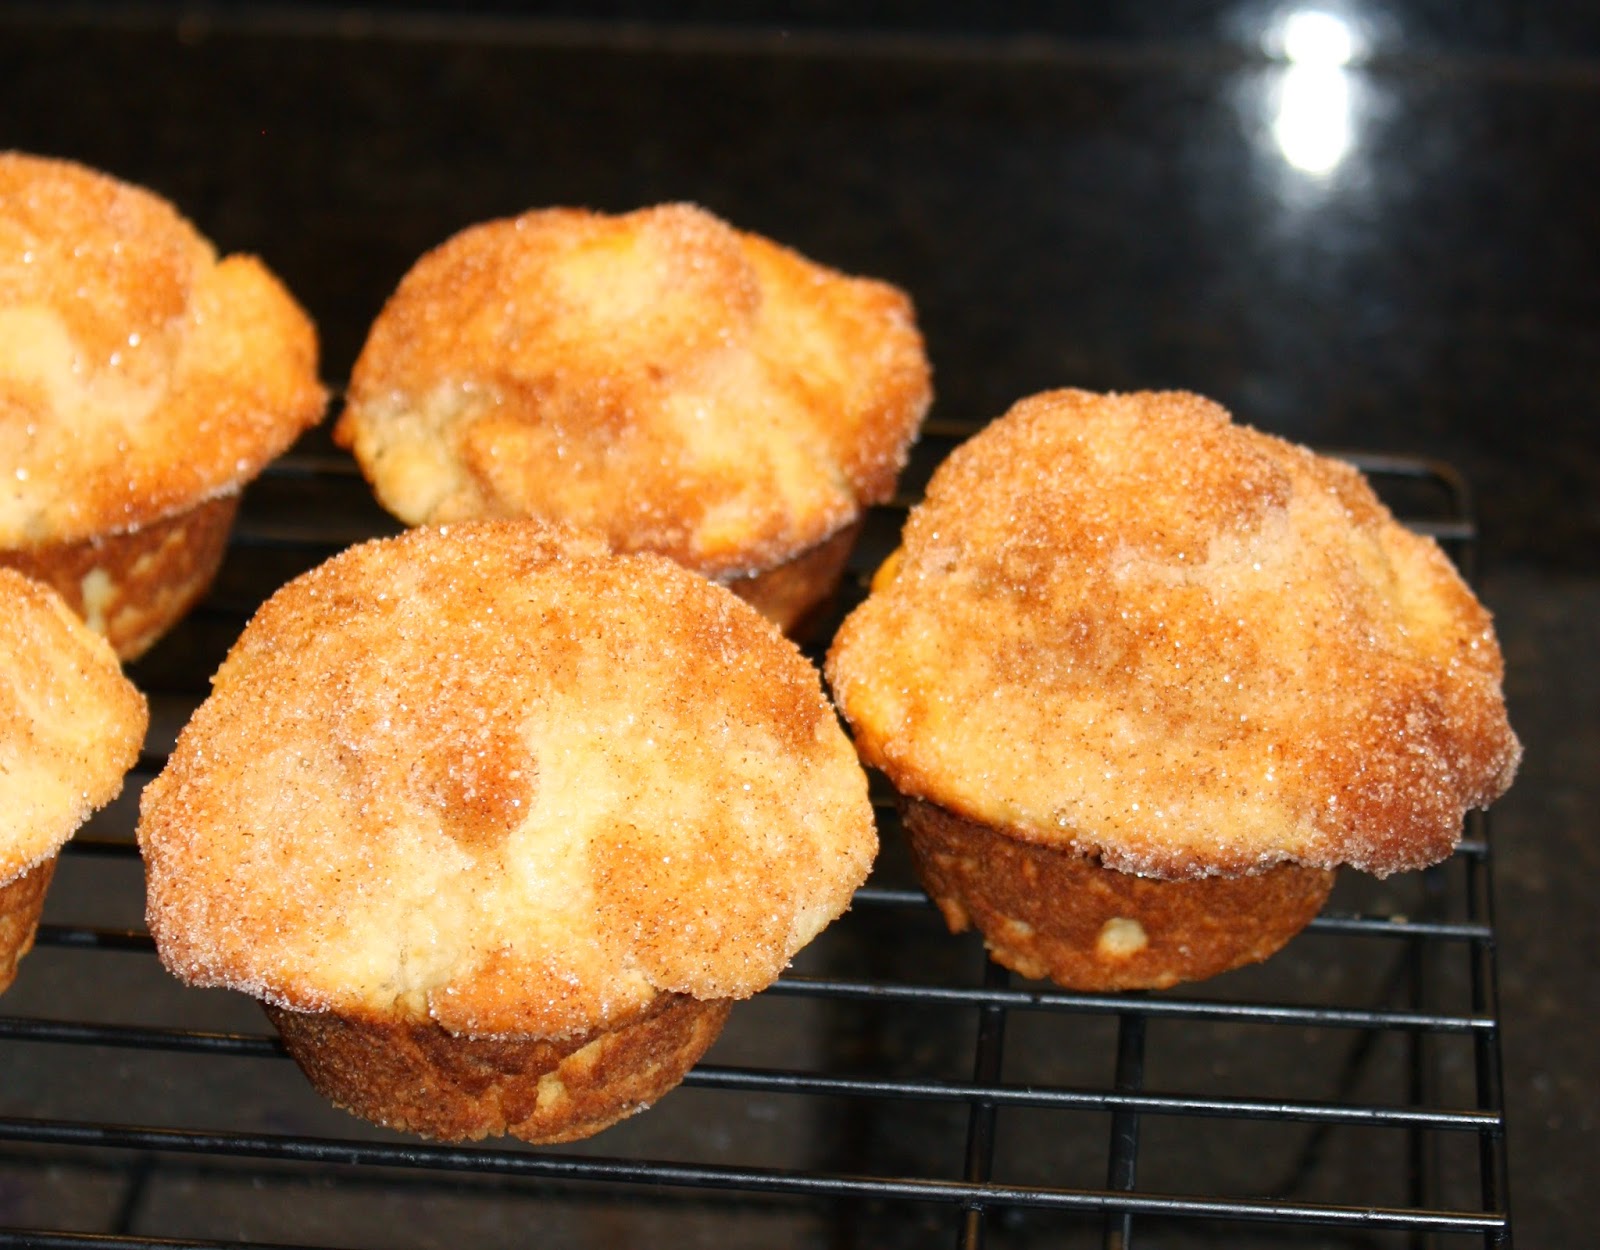
Muffin Tin Doughnuts

Can the people at America's Test Kitchen do anything wrong? Not in my book. Every recipe I have tried has been perfect. This one is no different. Who doesn't want doughnuts made without frying and in your pajamas? Exactly.
I have zero changes to the recipe and I just used milk with a splash of white vinegar to make buttermilk. I am certain they would be even better if I actually used buttermilk. They taste like cinnamon sugar cake doughnuts.
I also made a quick pink coating for James (who only wants pink doughnuts) out of juice and powdered sugar. I poured chocolate syrup over Zach's when he asked for chocolate. Neither of them liked these changes. But both of them liked the original version. Naturally.
The recipe is quick and easy, perfect for lazy Saturday mornings. We don't have those being Walls, so I made them on a slow Friday morning.

Muffin Tin Doughnuts
Cook's Country
Makes 12 big or 18 medium sized muffins

Ingredients:
2 3/4 cups all-purpose flour
1 cup sugar
1/4 cup cornstarch
1 tablespoon baking powder
1 teaspoon salt
1/2 teaspoon nutmeg
1 cup buttermilk
8 tablespoons unsalted butter, melted
2 large eggs plus 1 large yolk
1 cup sugar (coating)
2 teaspoons cinnamon (coating)
8 tablespoons unsalted butter, melted

Directions
1. Adjust oven rack to middle position and heat to 400. Spray a 12 cup muffin tin with cooking spray. Whisk flour, sugar, cornstarch, baking powder, salt and nutmeg together. Whisk buttermilk, melted butter, and eggs together in a separate bowl. Add wet ingredients to dry ingredients and stir until just combined.
2. Scoop batter into prepared tin and bake until doughnuts are lightly browned, about 20 minutes. Let cool in tin for 5 minutes.
3. For the coating, whisk sugar and cinnamon together in a bowl. Remove doughnuts from tin and dip into melted butter. Roll in cinnamon and sugar, pressing to adhere.

Friday, March 21, 2014

Almond and sage chicken

I follow a new blog, Clementine. I can't remember where I found it, but I dig it. They post different things each day from an interview with a sucessful woman, to clothing suggestions, a daily inspirational thought, cute home ideas and sometimes, meals. When I spotted the title Almond Crusted Sage Chicken, they had me at sage. And almond.
It is basically paleo and is totally delicious. And easy. I made a few tweaks to the recipe and every Wall liked it.

I mean as much as a 2 year old Wall likes anything. I roasted some broccoli along with the sprouts for Alex and I and most likely, frozen, microwaved peas for the boys.

I need to put this on my meal plan for this week, it is good.

INGREDIENTS (SERVES 4)
6 cups brussels sprouts, sliced
4 tablespoons olive oil
1lb chicken breasts, sliced thin
1 cup almond meal
3 eggs, whisked
3 tablespoons fresh thyme, minced
1 teaspoon sage, dried
2 teaspoons salt, divided
2 tablespoons olive oil
Sea salt
Freshly ground pepper to taste

Preheat oven to 425 degrees. In a large mixing bowl, add brussels sprouts with 4 tablespoons olive oil, sea salt and freshly ground pepper. Toss well. Add to a foil-lined baking sheet and roast for 30-35 minutes or until browned and charred.

Pat dry chicken and set aside. Add eggs, whisked with one tablespoon of water, in a shallow dish. In another shallow dish, whisk together almond meal, thyme, sage and sea salt. Coat raw chicken in egg, letting the excess drip off. Then, add the almond meal herb mixture and coat the chicken well, using your hands to pat it in. Add chicken to a clean plate and chill for 20 minutes.

In a skillet, add 2-3 tablespoons olive oil. Over medium heat, add chicken and grill each side for 5-6 minutes or until browned. Serve over roasted brussels sprouts and enjoy!

Wednesday, February 26, 2014

My favorite frittata

Don't you have one? A favorite frittata that is? If you do, please share it with me immediately and if you don't, try this one and see what you think.
After Thanksgiving Alex and I tried the Paleo diet for a month. What is that most of you say? (and the rest of you are rolling your eyes, I can see you) Well, Paleo is a new diet that eliminates all dairy and gluten. You eat "like the cavemen did". I think there are more details about also not eating potatoes (I break that rule) and some fruit (also guilty) and I did actually buy a book that I have yet to read. Basically we stopped eating bread and cheese.

Alex has always had stomach troubles and I get super puffy (i.e. fat) eating carbs. Plus, I loooooovveee a fad diet. I tried to go vegan while I was pregnant with James, until the first page said to NOT do that while pregnant. Pregnant ladies are so crazy.  I did the South Beach diet at some point in my 20's and I have a love/hate affair with Weight Watchers. So this was my trick of the month.

But we both really like it! Oh, we totally fell off of it around the holidays and he has done a better job of getting back on (damn you Cheez It's, damn you) but we both like how we feel.

Now....I will say that I do still eat dairy in moderation and Alex eats only two of the three daily meals Paleo. It is really hard for him to eat paleo during lunch. And while at Ninfa's. There is really no risk of either of us turning into Gwyneth Paltrow anytime soon.

But back to my point - this almost-Paleo frittata is delicious and holds up well to re-heating. I make it on Sunday and we eat it for breakfast until it is gone. I combined two recipes to come up with this one. It is simple and satisfying.
Sausage and (moderate amounts of) Cheese Frittata

Ingredients
1 lb pork sausage
1/4 - 1/2 cup cheddar cheese
1/2 tsp dried basil
1/8 tsp garlic powder
6 eggs beaten with a splash of milk

Directions
1. Heat broiler and place rack 10-15 inches from heat.
2. Brown sausage in large, oven proof skillet, stirring until it crumbles. Drain and wipe down skillet.
3. Return sausage to skillet and add the remaining ingredients.
4. Heat skillet on medium until the bottom of the frittata is just set.
5. Put under the broiler for 2 min and check doneness. Put under for one more minute maximum.

Wednesday, November 27, 2013

Strawberry Bread

A friend of Liv's made Strawberry Bread recently and Zach lost his mind over it. The recipe is from a cookbook that Liv and her friend's use all the time. I, of course, didn't have frozen strawberries but I did have frozen raspberries and mango from back when I was going to make smoothies for breakfast. That does not sound the least bit like me in the morning.
So I subbed the fruit, and you guys, this bread is good. It is not healthy. At. All. But it is delicious and super easy to make. I made one small loaf and 18 muffins. I froze the muffins to take during Zach's snack week. This was all that was left at the end of the first day.
Seriously, make this now. Whatever frozen fruit you have in your freezer would be great.

Strawberry Bread
From Wild about Texas

3 cups flour
4 eggs
1 tsp baking soda
1 tsp salt
2 tpsp cinnamon (I thought about omitting this but left it in and I liked it)
2 cups sugar
1 1/4 cups oil
2 (10 oz) packages frozen strawberries, thawed

Preheat over to 350 degrees. Sift dry ingredients together in a bowl. Make a well in dry ingredients. In a separate bowl, beat eggs adding oil and strawberries. Pour liquid into well of dry ingredients and stir util mixed. Pour into two large loaf pans or four small loaf pans that have been greased and floured (or sprayed with Pam baking spray). Bake 45 minutes for loaf pans and 25 minutes for muffins.

Wednesday, November 13, 2013

Empty the freezer Chicken Pot Pie

Two weeks ago I was determined  not to go to the grocery store for more than milk and fruit. We are a one income family and I have thousands of recipes at my disposal. Surely, I could clean out our freezers and make dinner for my family.

My favorite meal of the week was the chicken pot pie I made on Thursday. I used defrosted chicken breasts, a bag of mixed veggies and the puff pastry that may or may not have expired in September. Don't tell Alex.
It was delicious. I used Martha Stewart's recipe from The Martha Stewart Living Cookbook as a base but just used what I had. I highly recommend trying this if you need to clean out a freezer. 

James liked it once I spooned it out for him (though he did enjoy stabbing the breading) and Zach liked it once he figured out he could eat the breading off the ramekin.
Here is my version of the recipe - creepster face from Zach not included.

Chicken Potpie
Serves 4 (generously)
1 package boneless skinless chicken breasts
2 tbsp olive oil
1 bag mixed veggies (that your family likes)
2 tbsp butter
4 tbsp flour
1 cup chicken stock
1/2 - 1 cup milk
Zest of 1 lemon
1 tbsp dried thyme
1 tsp salt
1/4 tsp pepper
1 sheet defrosted puff pastry (or crescent rolls, really any dough will work great)

Directions
1. Cut the chicken breasts into cubes. Salt and pepper the cubes.
2. Brown the chicken in a skillet with the olive oil until brown on the outside and just done on the inside. Set aside.
3. Wipe out skillet and heat the butter. Once melted, add flour and whisk for 1 minute.
4. Add chicken stock then milk and salt and bring to a simmer. Cook until thick and bubbly, stirring the entire time.
5. Add the reserved chicken pieces, thyme, lemon zest, veggies and pepper. Taste and add more salt as needed. I needed to add more milk to this stage as well to fully cover the veggies.
6. Transfer to oven safe baking dish(es).
7. Flatten out puff pastry and cut to fit your dish. Slice a few holes in the top for venting and press to the sides.
If you have an egg, you can do an egg wash by whisking one egg and using a pastry brush to coat the top of the dough. I didn't have an egg (again, not going to the store) and it was fine without.
8. Bake according to the puff pastry package directions until the tops are golden brown.


Wednesday, November 6, 2013

Becuase I don't camp, I make S'mores Cookies


And you should too. I saw this photo on Pinterest of just the dough for these cookies and I wanted to run to the store and get those mini-mini-marshmallows. You all know my obsession with tiny food.
Campfire Cookies!! Perfect for fall!
Then I read the rest of the recipe and knew I had to go to the store ASAP for cinnamon graham crackers AND mini-mini-marshmallows.

You guys - these are good. Really, really good. Chewy and sweet and different than just chocolate chip cookies with marshmallows, thanks to the ground up graham crackers.

Now as Lauren pointed out, yes, you could buy already ground up graham crackers at the store and save yourself, and your food processor, some time. However, Amanda said, "Definitely try these cookies with the cinnamon grahams! It adds the perfect, tiniest hint of cinnamon to these cookies that just sends them over the top." And it does. If you are going to the trouble to buy the tiny marshmallows just grab some cinnamon graham crackers too.
I also made one change to the recipe. I like my cookies to spread out a bit. I think it makes them chewier and less cake like. So I subbed the 1 tsp baking power for 1 tsp baking soda and it was perfect.

Head over here and make these this weekend. It is like you are camping without the bugs and public/no restrooms.

Wednesday, October 30, 2013

BBQ Beef Pockets

Awhile back I had pinned this link for a blogger's Top 12 favorite meals of her husband. I finally got around to looking at it (you know I have SUCH a busy schedule) and the first thing I knew I had to make were these BBQ Beef Pockets.
They have four ingredients. Four. Though you do have to use your oven and stove, but the limited ingredient list and your husband/father in law thinking you are genius cook makes it worth a try.

I happened to have a leftover roll of crescents (thanks Tracey!) so I flattened out those and used them as the pockets vs. the pie crust mentioned in the recipe. For the last batch I sprinkled the tops with more cheese and that looked even more fancy.
In all honesty, I didn't like them. But I really don't like BBQ sauce or anything covered in it - like ground beef. But all males in my house loved them and I would make them again for them. They would be a perfect dinner for when I am not here.

Wednesday, September 11, 2013

Because Gwenie told me to


Ugh, you guys I made this tuna dish and had to tell you all about it. I really wanted to like it. And I liked it, but didn't love it. It is super weird, with tuna, anchovies, rice pasta (like I know what that is) and it was created by Gwyenth Paltrow.

Since I, obviously, want to be just like her (but not with weirdly named kids) I just knew I would love it. I kept getting confused with the name, Brown Rice Pasta with Tuna, Olives and Fried Capers, thinking it was brown rice. It is not. She wanted me to buy "brown rice pasta" if I was "avoiding gluten". I am not. I am in fact inviting gluten into my diet.

So once I finally realized I just needed regular pasta, I then had to buy 12 canned anchovy fillets, 2 - 8 oz jars of olive oil packed tuna and capers. Needless to say I spent an inordinate amount of time on the Canned Fish aisle of Randall's. Who knew there were so many different varieties of tuna? Seriously, there are a ton.

But I pushed on. I just knew that I would like this because Gwenie said I would.

It is fairly straight forward once you get all the odd ingredients, though I think the 12 anchovy fillets were overkill. And I think one big can of tuna would also do just fine. Calm down Gwenie, I know we need Omega-3s but calm down.

I really debated about putting this here, but in the end I did like it. It was healthy, if salty, and had fried capers.

Oh, did I not mention that I fried capers?

So here it is with the swaps I will make when I cook it again. In like, two years.

Brown Rice Pasta with Tuna, Olives and Fried Capers
Photo courtesy of Self magazine

Ingredients
8 oz pasta
1/2 cup olive oil
1/4 cup capers, rinsed and dried
1 can anchovy fillets
2 cloves garlic, minced
1/2 teaspoon red pepper flakes
1 large can olive oil-packed tuna, drained
Juice of 1 lemon

Directions
Cook pasta as directed on package until al dente, 7 to 8 minutes.
In a skillet over high heat, heat oil. Cook capers, stirring, until crispy, 2 minutes. Remove capers with a slotted spoon; transfer to a plate, reserving oil.
Heat reserved oil. Add anchovies, garlic and pepper flakes. Cook, stirring, until anchovies dissolve and garlic begins to brown, 3 to 4 minutes.
Add tuna; stir to break up tuna. Add lemon juice; cook, stirring, until tuna is warmed through and starting to brown, 2 to 3 minutes.
Divide pasta among 4 bowls; divide tuna mixture and capers evenly over pasta.

Wednesday, September 4, 2013

Martha nails it again

I just read this fascinating article about how Martha's company is not doing well and she is terrible to work for but still takes a huge paycheck. Is anyone really surprised?

But man, that woman knows her chicken dishes. I like to try one new dish a week, to add something new to my rotation that might be the best thing ever. Or the easiest thing ever. This one, Spicy Peanut Chicken, is good and very, very easy.
Last time I went to Costco I purchased the huge bag of chicken tenders, which barely fits in my fridge. So instead of using the chicken thighs the recipe calls for, I used the tenders and cooked them for the same amount of time.

I just left out the sambal oelek when making the boys version (in the little Ziploc below) and they ate it all. Apparently we were all in the need of a new chicken dish. I put the chicken and sauces together the night before which makes it even easier. I all I had to do the next day for dinner was put it on a foil lined dish, put the (un-sauced) broccolini with a bit of olive oil on it next to the chicken and in 10 minutes dinner was ready.
Oh, do you not have your husband's elementary academic excellence medals lying around your kitchen. Huh, that seems odd.

Friday, July 19, 2013

The cupcakes that stole the show

I had no idea when I made rainbow cupcakes for James' party that it would garner such praise. They were very, very easy to make just a tad time intensive. But way less than rainbow cakes. I mean, the labor involved in that. Baking six layers of cake all dyed different colors, then leveling it and icing it? No thank you.

But I had made three color cupcakes last year for Mardi Gras (which I am shocked I did not blog about) so I thought, could I add three more colors with the same result? Worth a shot and it if they look terrible, we will just have solid color cupcakes in rainbow colors. I could live with that.

I just used two boxes of cake mix (I can't be bothered to make it from scratch) and gel food color. I split the batter into six bowls.
Then just put about a tablespoon (those are the small spoons from my flatware set) in each liner layering in the colors of the rainbow. You can see the bottom three colors here.
My trusty sidekick insisted on sitting on the island next to me to "help". Mainly he ate some old pretzels and pointed to each color saying, "Blue?".
I baked the cupcakes for the amount of time on the box and they were perfect.
I only allowed the boys to eat one to test it. Well and Dewayne got a left over purple one too.

For the icing, again I did not make it, but did pipe the store bought version on the top of the cupcakes to look like a cloud. Well that is what my sister called it. Really it looked terrible until I nestled two of each kind of animal on top and one of the toppers (which Lita at Kindly Reply customized for me to print out). Dewayne and Lauren helped me identify the animals in the pack. It was not an easy task.
And while the icing was the least attractive part, that was the only part that James ate. But don't get confused into thinking he was impressed by any of this nonsense. He would have preferred I put a plate of icing down in front of him and back slowly away.

Tuesday, July 16, 2013

Blackberry Crumble

So what to do when you come home from 15 minutes of blackberry picking with a bushel of blackberries? Blackberry crumble of course. In the pan that you brought the blackberries home in because, the thought of cleaning another pan makes you want to crawl under your desk and hide.


My friend Beth brought me the peach crumble version after I had James and I successfully ate the entire pan, though not in one sitting. It is perfect to keep in the fridge and dish out a bit each night. I dream about this crumble, I have made my fair share and this one is the best in my book. The perfect combo of fruit to topping. I don't know what Alex thinks as I can't be sure he has had any versions of this dish. I would ask him but then he would know he was missing out. Let's just keep this our secret. And we know he won't read it here - remember he "lives the blog" so doesn't need to read it.

The crumble is great with any fruit in season. Make it today with whatever is on sale. Then bring some to me because I have a two year old who can turn on the light in his room and does so at 5am. See you tomorrow morning.

My only comment for the recipe is to be sure to use the 11x7 pan if you have it. You want this to be a thin layer of fruit and topping or it gets way too buttery. Alternatively, you could scale back the butter. But why? Just use a bigger pan.

Fresh Peach Crumble
Food.com

Ingredients:
6 cups peeled sliced ripe peaches (any fruit will work and I didn't peel the peaches - waaay too lazy for that)
1/4 cup packed brown sugar
3 tablespoons flour
1 teaspoon lemon juice
1/2 teaspoon lemon zest, grated
1 teaspoon cinnamon

Topping:
1 cup flour
1 cup sugar
1 teaspoon baking powder
1/4 teaspoon salt
1/4 teaspoon nutmeg
1 egg, beaten
1/2 cup butter, melted and cooled
Directions:

1 Heat oven to 375*.
2 Put peach slices in greased, shallow 11x7 baking dish.
3 Mix brown sugar, flour, lemon juice, peel, and cinnamon.
4 Sprinkle over the peaches.
5 Mix flour, sugar, baking powder, salt, and nutmeg.
6 Stir in egg until mixture is coarse crumbs.
7 Sprinkle over peaches.
8 Drizzle butter evenly over topping.
9 Bake for 38 minutes.

Wednesday, June 26, 2013

Mini-Pizza two ways

You all know my love of freezer cooking; it is slightly out of control. One of the items I always have in my freezer are mini-pizza's for the boys. I use the veggie sauce (or any sauce of course), sandwich thins and mozzarella cheese. I toast them in the toaster oven for 4-5 minutes just to melt the cheese and they are my go to lunch or dinner option. I used to be able to sneak in some spinach between the sauce and cheese but Zach is now on to me about putting "lettuce" on his pizza. Fair point. I am making him eat sauce comprised totally of vegetables.

When I saw this recipe for mini-deep dish pizza's on Pinterest, I thought it might be a different way to make pizzas. More work, but so cute. And you know how I love cute food. Plus I had purchased a large bag of flour tortillas at Target on a whim. They were not whole wheat or grain or anything but delicious white flour. So, so fluffy.

Mini Deep Dish Pizzas

And so, so cute, right? You know I get giddy about breaking out the biscuit cutter. They were especially good for James being mini himself. I cut them once in half and he could do the rest.

Mini-Deep Dish Pizza
Photo and slightly adapted recipe from Dashing Dish

3-4
Whole wheat wraps
1
(15 oz) Can pizza sauce
3/4 cup
Shredded mozzarella cheese
1/4 cup
Parmesan cheese


1        Preheat oven to 400 degrees. Spray a 12 count muffin tin with non-stick cooking spray.
2        Start by laying each tortilla out individually on a flat surface, and use an empty can, cup, or cookie cutter to cut 3-4 medium circles out of each wrap.*I used a biscuit cutter
3        Press each wrap circle into muffin tin using your fingers. Note: it doesn’t have to cover the entire side of the tin, it should just fit snugly
4        Meanwhile, pour pizza sauce and Parmesan cheese into a medium sized bowl. Stir until everything is well combined. *Totally optional
5        Drop about 1-2 tbs of sauce in each wrap
6        Divide mozzarella cheese evenly over each mini pizza and any toppings.
7        Bake in preheated oven for 8-10 minutes, or until cheese is melted and lightly browned.
 

Wednesday, June 19, 2013

Pasta sauce you can feel good about

In case you refuse to buy any more whole wheat pasta because of the weird aftertaste and only serve your children the evil "enriched" pasta.
I have been making this pasta sauce for a couple of years now. It is super easy, full of veggies and tastes good too. It really should have been part of Deceptively Delicious. You basically roast a bunch of veggies, puree them in the food processor and voila, done. No stove cooking, no seasoning, just roasted veggies and some tomato paste. I also use the sauce to make mini pizza's for the boys. It freezes great, you can put it in one Ziploc on in ice cube trays. Any place you need a pasta/pizza sauce you can sub this in and feel good about it.

Pinwheels with Roasted Veggie Sauce

Roasted Veggie Sauce
Photo and recipe from Cookingwithmykid.com

Ingredients:
1 large red pepper (cut into chunks) *Any color but green would work
1 medium eggplant (peeled + cut into chunks)
1 medium onion (peeled + cut into chunks)
1 cup baby carrots
2 tomatoes (cut into chunks)
3 garlic cloves (peeled) *I just use my bottled minced garlic
2 tablespoons olive oil
2 tablespoons tomato paste
salt & pepper


Preheat the oven to 400 degrees.
Place all the veggies, garlic and onions on a rimmed cookie sheet. Drizzle with olive oil and toss to coat.
Crack some fresh pepper and salt onto veggies and roast for 35 to 45 minutes or until tender but not mushy.
When the veggies are done roasting, combine the veggies and tomato paste in a food processor until it has formed a thick sauce.